No products in the cart.
Blog
How To Bleach Paint A Shirt: Creative DIY Techniques
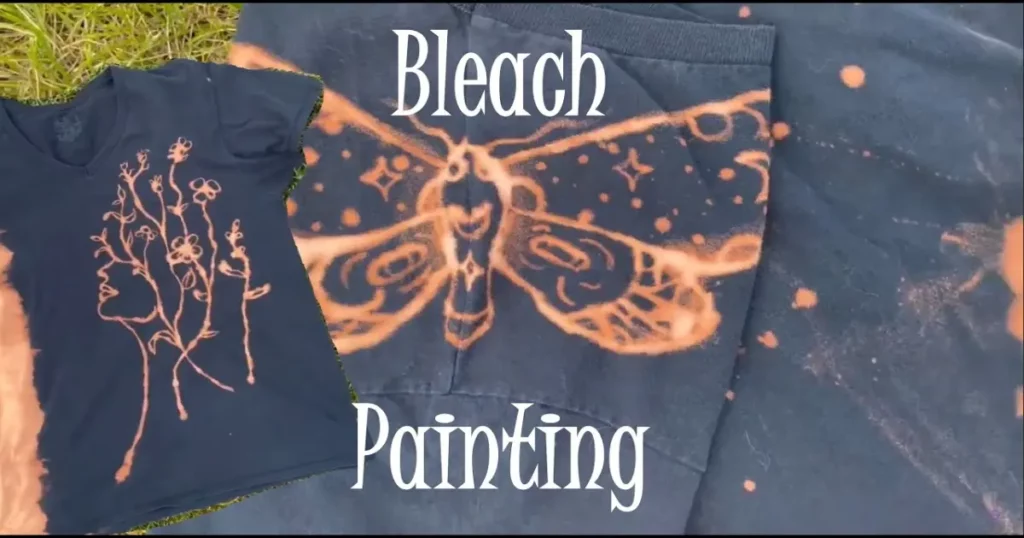
Are you looking to add a personal touch and create unique? Knowing how to bleach paint a shirt is fantastic to unleash inner artist and transform plain shirts. In this comprehensive guide, we’ll explore various techniques and methods for bleach painting, from making stencils to tie-dying with bleach. So, grab your supplies and let’s get started on your DIY fashion journey!
Materials You’ll Need
Before diving into the exciting world of how to bleach paint a shirt, make sure you have the following materials ready:
- A plain cotton
- Bleach
- A spray bottle
- A bleach pen
- A paintbrush
- Scissors
- Sublimation paper
- Bleaching gel
Some Ways How To Bleach Paint A Shirt

Making Stencils And Designs
Create Your Stencils:
- Start by deciding on the design you want to know how to bleach paint a shirt onto.
- Draw or print your chosen design on a piece of cardstock or stencil material.
- Use scissors to carefully cut out your design, creating a stencil.
One of the most versatile and creative aspects of how to bleach paint a shirt is the ability to design your own stencils, allowing you to personalize your clothing with unique and meaningful patterns.
To get started, first, brainstorm the design you want how to bleach paint a shirt. It could be anything from your favorite quote or symbol to a representation of your hobbies and interests. Once you have your design in mind, you can draw it by hand or use a computer to print it out.
Transfer your design onto a piece of cardstock or stencil material and carefully cut it out using scissors, ensuring that your lines are clean and precise. The beauty of creating your stencils is that you have complete control over the final outcome, giving you the freedom to express your creativity in any way you like.
Whether it’s a minimalist design or an intricate masterpiece, your stencils will serve as the foundation for your bleach painting project, allowing you to turn your plain shirt into a wearable canvas for your imagination to run wild.
Position the Stencil:
- Lay your plain shirt flat on a surface.
- Place your stencil on the shirt, ensuring it’s centered and secured with tape or adhesive if necessary.
Once you’ve meticulously crafted your stencil, the next crucial step in the bleach painting process is positioning it correctly on your plain shirt. This step requires careful attention to detail to ensure that your design appears centered and precisely where you want it.
Begin by laying your shirt flat on a clean and even surface. You may want to place a plastic or cardboard sheet inside the shirt to prevent bleach from seeping through to the other side. Now, take your stencil and gently place it on the shirt, making sure it’s aligned with your desired location and orientation.
To keep the stencil in place during the bleach paint a shirt process, you can use adhesive tape or small weights, ensuring that it doesn’t shift or move. This step may seem straightforward, but it’s crucial to get it right, as the stencil’s placement will determine the final look of your design. So, take your time to position it accurately, and you’ll be well on your way to creating a stunning, customized shirt that reflects your unique style and artistic vision.
Use A Spray Bottle:
- Fill a spray bottle with bleach (diluted with water if you want a lighter effect).
- Hold the bottle about 6-12 inches away from the shirt and spray over the stencil.
- Allow to understand how to bleach paint a shirt to sit for a few minutes, depending on the desired effect.
- Remove the stencil and rinse the shirt thoroughly with cold water to stop the bleaching process.
- Wash and dry the shirt separately from other clothing to prevent any residual bleach from spreading.
Using a spray bottle is one of the most versatile and popular techniques how to bleach paint a shirt to create captivating designs on your shirt. It offers an excellent way to achieve unique patterns and gradients while maintaining control over the bleach application. To begin, fill a clean spray bottle with bleach.
Depending on the desired effect, you can dilute the bleach paint a shirt with water for a lighter outcome. Hold the spray bottle about 6 to 12 inches away from your shirt and aim it at the area where you’ve positioned your stencil or where you want to create your design.
Gently squeeze the spray bottle trigger to release a fine mist how to bleach paint a shirt onto the fabric. Be cautious not to saturate the shirt too quickly; start with a light mist and gradually add more as needed to achieve the desired intensity.
Remember that bleach works quickly, so monitor the progress of your design closely. Allow the bleach to sit for a few minutes or until you see the color change you desire, then carefully remove the stencil.
To halt the bleaching process, rinse the shirt thoroughly with cold water. It’s essential to wash and dry the shirt separately from other clothing to prevent any residual bleach from affecting other garments.
Using a spray bottle allows you to experiment with various patterns and techniques, making it a fantastic choice for both beginners and experienced bleach painters seeking to create intricate, one-of-a-kind designs.
Use A Bleach Pen To Bleach Paint A Shirt
Precision with a Bleach Pen:
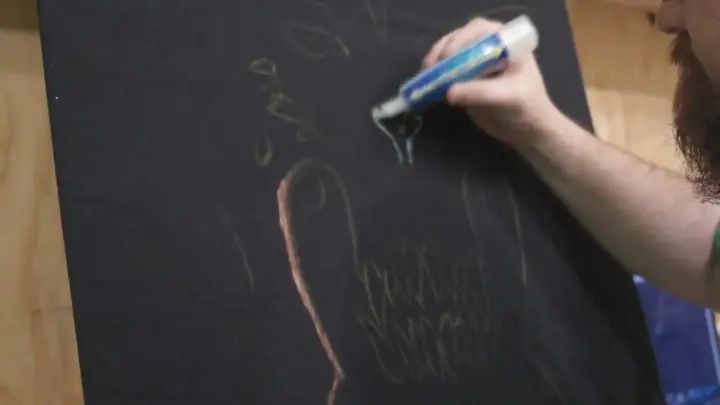
- If you prefer freehand designs or more intricate details, a bleach pen is your best friend.
- Simply use the bleach pen like a regular pen or marker to draw your design directly onto the shirt.
- Let the bleach sit for a few minutes and rinse as mentioned above.
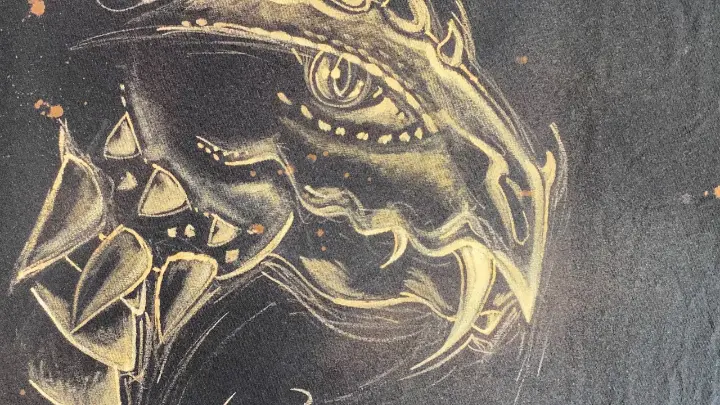
For those who prefer more precision and the ability to create intricate details in their bleach painting, the bleach pen is a valuable tool. It functions much like a regular pen or marker, but instead of ink, it dispenses bleach. This level of control is perfect for freehand designs or adding specific highlights to your shirt. To start, make sure your shirt is laid flat on a stable surface.
Grab your bleach pen and shake it well to ensure how to bleach paint a shirt is evenly distributed. Then, simply use the bleach pen to draw your design directly onto the fabric. The bleach will react with the shirt’s color, creating a striking contrast.
You can vary the pressure and stroke width to achieve different effects, from fine lines to broader strokes. Keep in mind that bleach works relatively quickly, so be mindful of the time it takes for the bleach to achieve your desired effect.
Once you’re satisfied with the result, rinse the shirt thoroughly with cold water to stop the bleaching process. Wash and dry the shirt separately from other laundry items to prevent any bleach paint a shirt residue from affecting them.
Using a bleach pen is an excellent choice for those who want to exercise their creativity with precision and finesse, enabling them to create intricate and personalized designs on their shirts.
Use A Paintbrush
Paintbrush for Artistic Freedom:
- For more artistic control and the ability to create gradients or blended effects, use a paintbrush.
- Dip the paintbrush into bleach paint a shirt (you can dilute it with water for a softer effect) and carefully apply it to the shirt, following your design.
- Again, rinse the shirt thoroughly after achieving your desired look.
When it comes how to bleach paint a shirt, using a paintbrush offers a unique level of artistic freedom and control over the final outcome. This method allows you to create gradients, blended effects, and intricate designs that can be challenging to achieve with other techniques.
To begin, ensure your plain shirt is laid flat on a stable surface and is protected from any potential bleach leaks by placing a plastic or cardboard sheet inside. Dip a clean paintbrush into your bleach solution, which can be diluted with water for a softer effect.
Now, carefully apply the method how to bleach paint a shirt, following your chosen design or creating freehand strokes. The brush’s bristles allow you to vary the width and intensity of the bleach application, giving you the flexibility to experiment with different techniques. As bleach works relatively quickly, monitor the progress of your design closely, adding more bleach as needed to achieve the desired effect.
Once you’re satisfied with the result, rinse the shirt thoroughly with cold water to stop the bleaching process. To ensure the bleach is completely removed, wash and dry the shirt separately from other laundry items. Using a paintbrush for your bleach paint a shirt projects opens up a world of creative possibilities, enabling you to transform plain shirts into wearable masterpieces that showcase your unique style and artistic flair.
Tie-Dying With Bleach
Tie-Dye Inspired Creations:
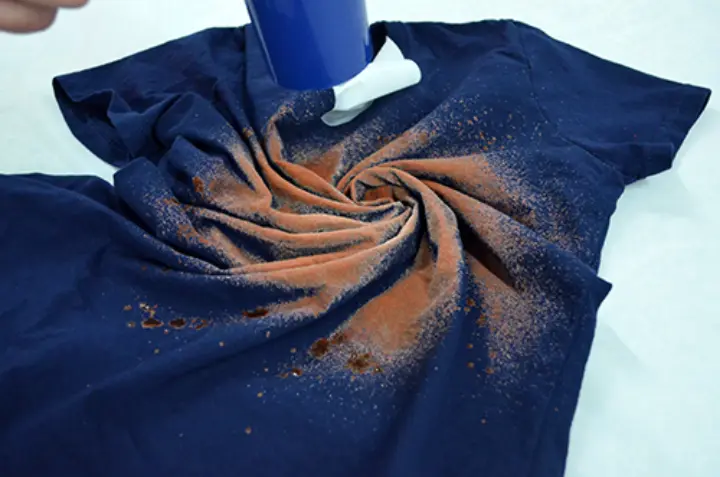
- Create a tie-dye effect by twisting or folding your shirt into your desired pattern.
- Use rubber bands to secure the folds.
- Apply bleach to the different sections of the shirt, allowing it to penetrate the fabric.
- Rinse, wash, and dry the shirt once you achieve the desired level of bleaching.
If you’re looking to create a unique and captivating tie-dye effect on your shirt, bleach can be your artistic tool of choice. Tie-dying with bleach paint a shirt involves twisting, folding, or scrunching your shirt to create patterns and then selectively applying bleach to achieve contrasting colors.
To start, lay your plain shirt flat and decide on the tie-dye pattern you want to create. You can twist the shirt into a spiral, accordion-fold it, or scrunch it randomly—let your creativity guide you. Once you’ve achieved the desired pattern, use rubber bands to secure the folds in place. These bands will act as barriers, preventing the bleach from reaching certain areas and creating the distinctive tie-dye look.
Now, it’s time to apply the method how to bleach paint a shirt. Using a spray bottle, pour bleach into the sections of the shirt where you want to introduce the contrasting color. The bleach will work its magic, gradually lightening those areas. You can experiment with the concentration of bleach and the number of sections you treat to create different effects.
Keep in mind how to bleach paint a shirt will continue to work, so monitor the shirt closely until you achieve the desired level of bleaching. Once you’re satisfied with the result, rinse the shirt thoroughly with cold water to halt the bleaching process and remove the rubber bands.
To ensure that the bleach is entirely washed out, wash and dry the shirt separately from other laundry items. Tie-dying with bleach is an exciting way to breathe new life into your shirts, allowing you to infuse them with a touch of bohemian flair and a personalized twist, making each piece as unique as your own artistic vision.
Sublimation and Bleaching Gel
Advanced Techniques:
- If you’re feeling adventurous and want to create photorealistic designs or intricate details, consider using sublimation paper.
- Print your chosen design on sublimation paper and then transfer it to the shirt using a heat press.
- Once the design is transferred, use bleach gel to enhance or add specific highlights to your creation.
- Remember to rinse, wash, and dry your shirt as usual.
For those seeking to take how to bleach paint a shirt to the next level and explore more advanced techniques, sublimation and bleaching gel offer a world of creative possibilities. Sublimation allows you to achieve photorealistic designs or intricate details, while bleaching gel enables you to enhance or add specific highlights to your creations.
To embark on this artistic journey, you can start by printing your chosen design onto sublimation paper. This paper is specially coated to hold sublimation ink, which can be transferred onto fabric using a heat press. Once you’ve transferred your design onto the shirt, you’ll have a high-quality image with vibrant colors and sharp details that can serve as the foundation for your bleach painting masterpiece.
Now comes the exciting part – using bleaching gel to elevate your design further. Bleaching gel is a concentrated how to bleach paint a shirt that can be applied with precision, making it ideal for adding highlights or fine details to your sublimated design. You can use a brush or even a bleach pen for this step, depending on the level of detail you wish to achieve. Be mindful of the bleach’s potency and work with care to avoid over-bleaching or spreading it where it’s not wanted.
As always, after applying bleach gel to your sublimated design, rinse the shirt thoroughly with cold water to stop the bleaching process. To ensure the bleach is completely removed, wash and dry the shirt separately from other laundry items.
The combination of sublimation and bleaching gel allows you to create stunning, personalized shirts that are limited only by your imagination. Whether you aim to reproduce photographs, intricate artwork, or simply enhance your sublimated design with unique highlights, these advanced techniques can elevate your bleach painting projects to a whole new level of artistic expression.
Conclusion
In conclusion, bleach paint a shirt is a versatile and creative endeavor that offers a multitude of techniques how to bleach paint a shirt to express your individual style. Whether you prefer the precision of a bleach pen, the artistic freedom of a paintbrush, or the unique charm of tie-dye effects, there’s a method for everyone to explore. With a bit of practice, you’ll become a bleach painting pro, turning your wardrobe into a canvas for your imagination to run wild.


